Elastic Search installation (UNIX)
- Install Ubuntu 20.04 LTS (Server installation)
- Java – Elasticsearch 7.8.0 comes with openJDK as part of the package, no java is needed to be installed
The purpose of this document is to explain how to install elastic search on Ubuntu servers,
The document is built with the following steps: installation, configuration, and testing
In general, we have 3 flavor (layouts) for the server:
- Single Server – this flavor is one server with no redundancy, the same server acts as Master/Node/Client, use this flavor for testing/application that you don’t care losing the data
- 3 servers with redundancy - this flavor is good for small projects. In this flavor all 3 servers will act as Master/Node/Client
- Multi server environment – this flavor is good for medium/large environment with millions of documents per day. In this flavor you have 3 masters, 2 clients, 2..n Nodes
The installation guide is using internet and downloading the latest version of elastic.
The installation part is the same for all flavors. After the completion of the installation part we will configure the servers based on the chosen flavor
The elastic stack components are not available as part of the ubuntu package repository.
In order to install them using APT we will need to add the “Elastic package source list”
Run the following command in order to import the Elasticsearch public GPG key into APT:
wget -qO - https://artifacts.elastic.co/GPG-KEY-elasticsearch | sudo apt-key add -

Next, we need to configure the apt repository on Debian system.
the following command will add the Elasticsearch 7 repository on ubuntu server
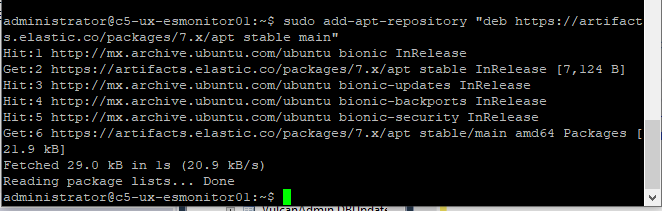
sudo add-apt-repository "deb https://artifacts.elastic.co/packages/7.x/apt stable main"
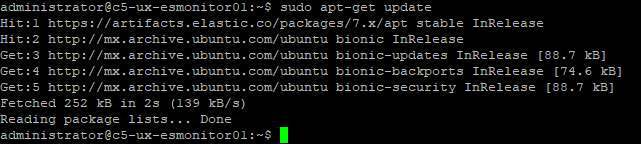
After the repository was added successfully, we need to update the cash
sudo apt-get update
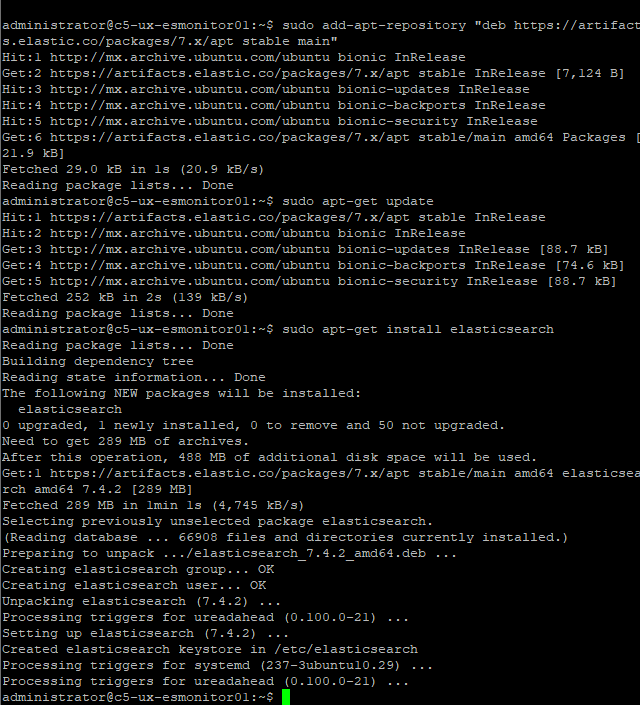
Next we can install the latest version of Elasticsearch on the system
sudo apt-get install elasticsearch=7.8.0
In this section we will configure the 3 flavors (Single Server, 3 servers with redundancy, Multi server environment)
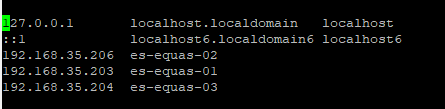
in order for the servers to “see” each other we need to modify the host file in all the server to contain the IP&hostname for all other servers.
run the following command to edit the hosts file, and add the list of all server that should be in the cluster (this is not needed for single node)
sudo nano /etc/hosts
- Java memory configuration:
In order to configure the memory that will be used for elasticsearch run the following command:
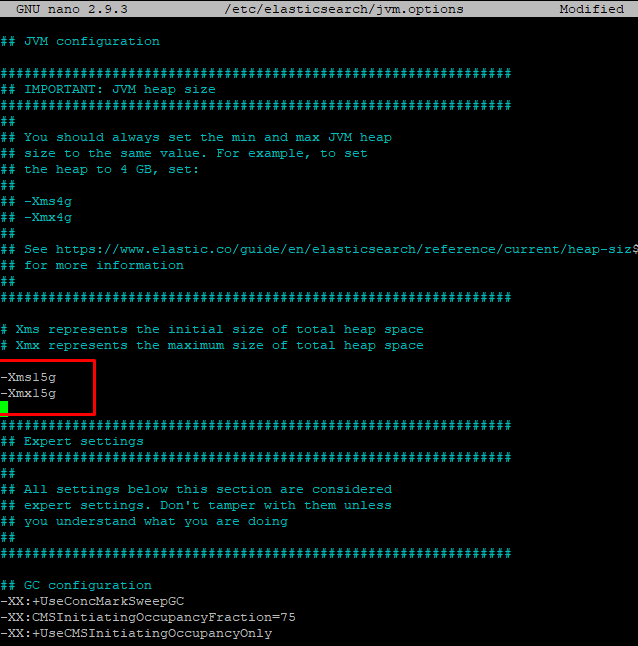
sudo nano /etc/elasticsearch/jvm.options
The setting for the memory should be set to no more then 50% of the installed memory,
the setting will be given for each environment based on the infrastructure design
In order to configure the Elasticsearch run the following command:
sudo nano /etc/elasticsearch/elasticsearch.yml
Change the following configuration:
cluster.name: [e.g “es-lab”] - Provide the name of the cluster, this configuration should be the same for all the nodes
node.name: [e.g. es -node1, es-master1, es-client1] - provide the name of the node, this should be unique name for each of the nodes in the cluster
network.host: [e.g. 0.0.0.0, 192.168.35.203] – set the IP address for the node, in single node you can set it to 0.0.0.0, for other configuration you need the IP of the server
discovery.type: single-node – this configuration should be set only for single node
path.data: [full path for the data location e.g. /var/storage1/elasticsearch]
bootstrap.memory_lock: true
discovery.seed_hosts: ["Master1-IP","Master2-IP", "Master3-IP"] – set the list of the master server this setting should be for “3 servers with redundancy”, “Multi server environment”
cluster.initial_master_nodes: ["MasterNodeName1", " MasterNodeName1", " MasterNodeName1"] - set the name of the master nodes, this name should be the exact name as you set for the “node.name” configuration for the master servers
The following setting are for “multi-server environment”:
For master node:
node.master: true
node.data: false
node.ingest: false
cluster.remote.connect: false
For Data Node:
node.master: false
node.data: true
node.ingest: false
cluster.remote.connect: false
For Client Node:
node.master: false
node.data: false
node.ingest: false
cluster.remote.connect: true
Elastic need permission to lock pages in memory, in order to allow the server getting the permission we need to edit the service configurations:
sudo systemctl edit elasticsearch
add the following and save the file:

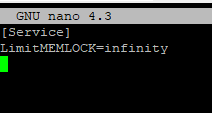
Save the file and run the command:
sudo systemctl daemon-reload

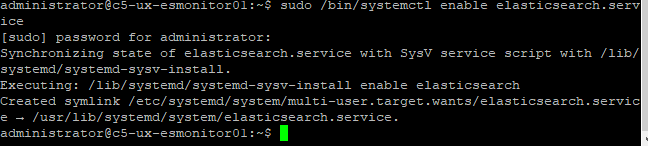
In order to configure the Elasticsearch to start automatically when the system boots run the following command:
sudo /bin/systemctl enable elasticsearch.service
In order to star & stop the elasticsearch service:
sudo systemctl restart elasticsearch.service
sudo systemctl start elasticsearch.service
sudo systemctl stop elasticsearch.service
![]()
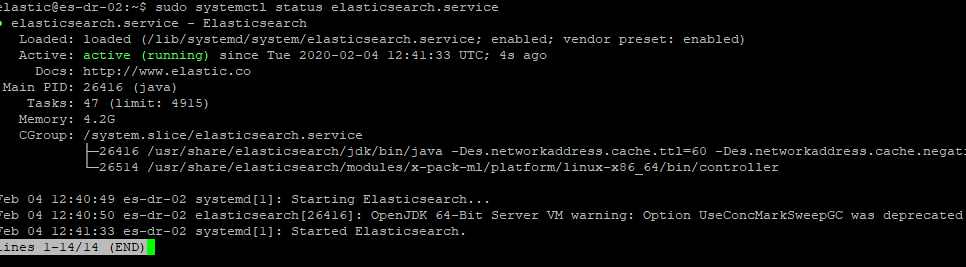
Check the status of the service:
sudo systemctl status elasticsearch.service
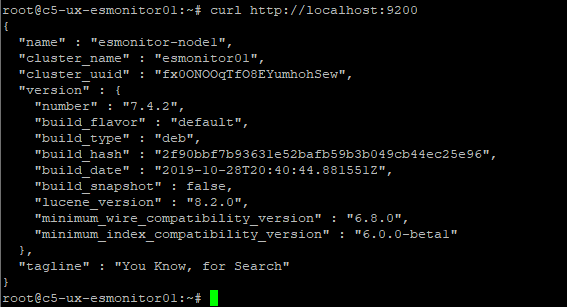
Now we can check and see that the elastic is working:
curl http://[server-ip]:9200
Stop Service:
sudo systemctl stop elasticsearch.service
Remove Elastic:
sudo apt-get remove elasticsearch
Created with the Personal Edition of HelpNDoc: Write eBooks for the Kindle