Gantry’s and Segments configuration
In the following example we will add new Gantry that cover 2 LPRs.
LPR names are:
GU05_AV. JUAN PABLO II Y SAN PEDRO_CU42/LPR1/1
GU05_AV. JUAN PABLO II Y SAN PEDRO_CU42/LPR1/2
[Zone _ Street Name]/LPR group id in the pole/ LPR#
- Open CityMind client as rootadministrator user
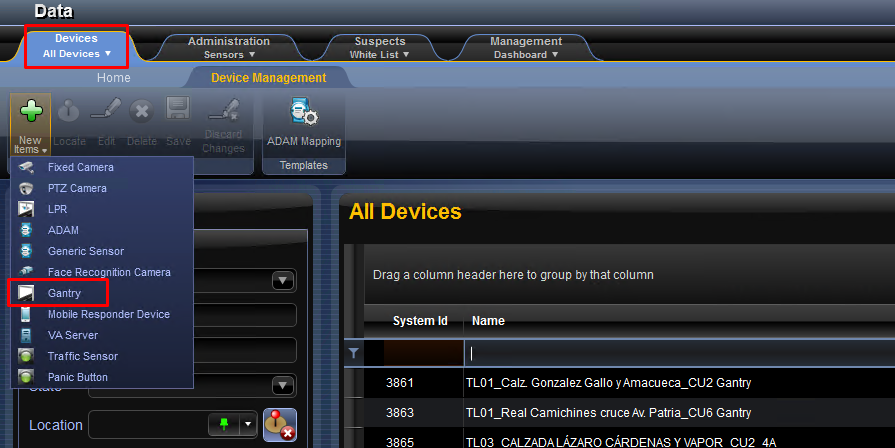
- On “Data” windows go to Devices TAB
- Select “New Item” 🡪 Gantry
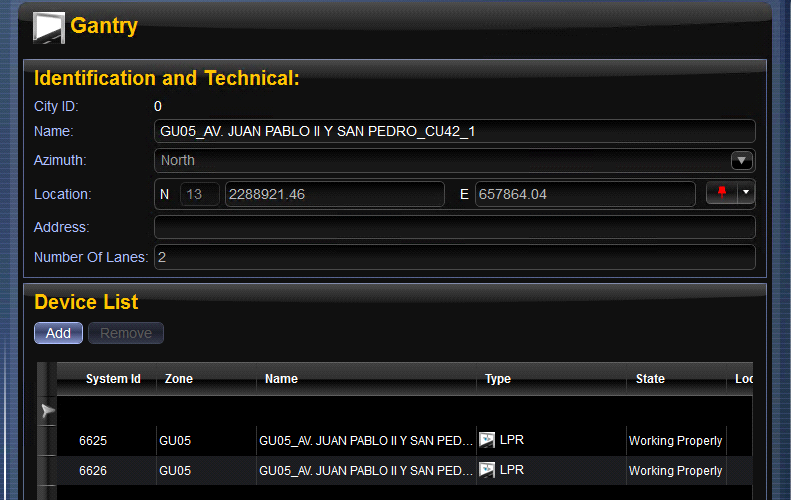
- In the new windows, complete the following information
- Name: the name of the Gantry is built from the name of the LPRs and it ID
GU05_AV. JUAN PABLO II Y SAN PEDRO_CU42_1
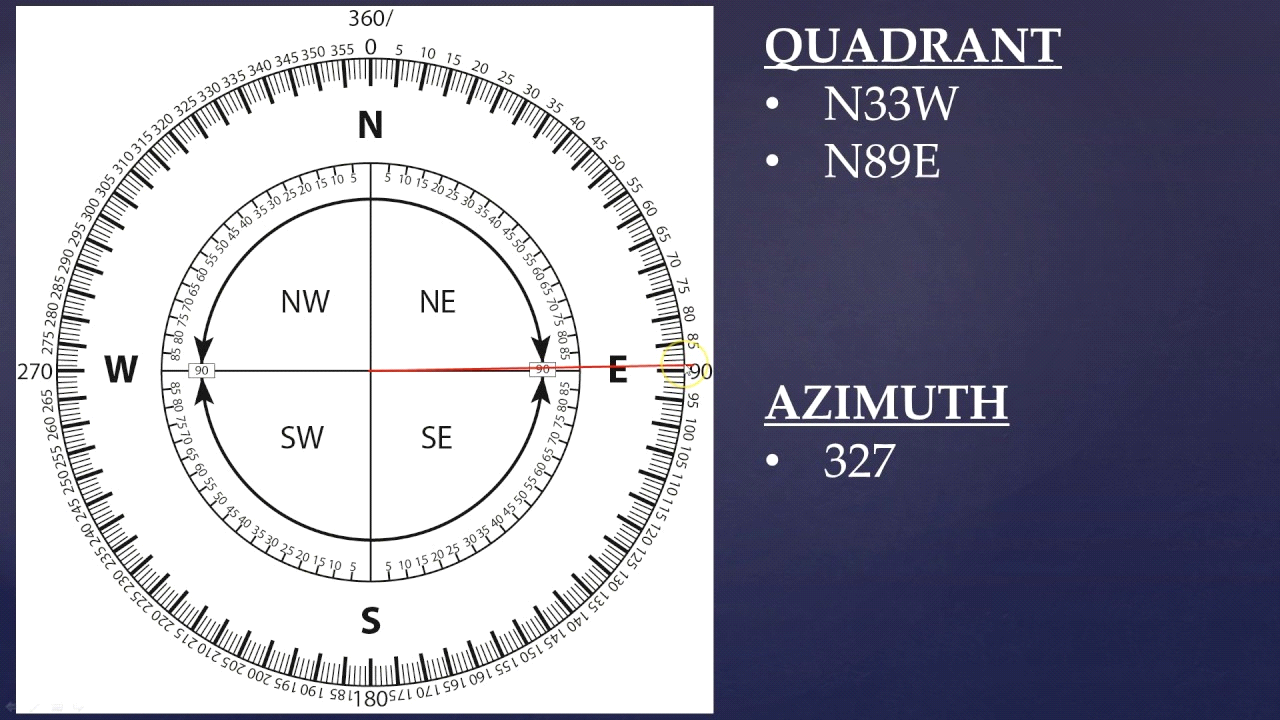
- Azimuth – Translate the “Heading” value of the LPR to Azimuth (see section 4)
- Location – Copy the LPR location (Easting and Northing) to the correct filed
![]()
- Number of Lane – If Gantry contain 2 LPR’s than value should be 2
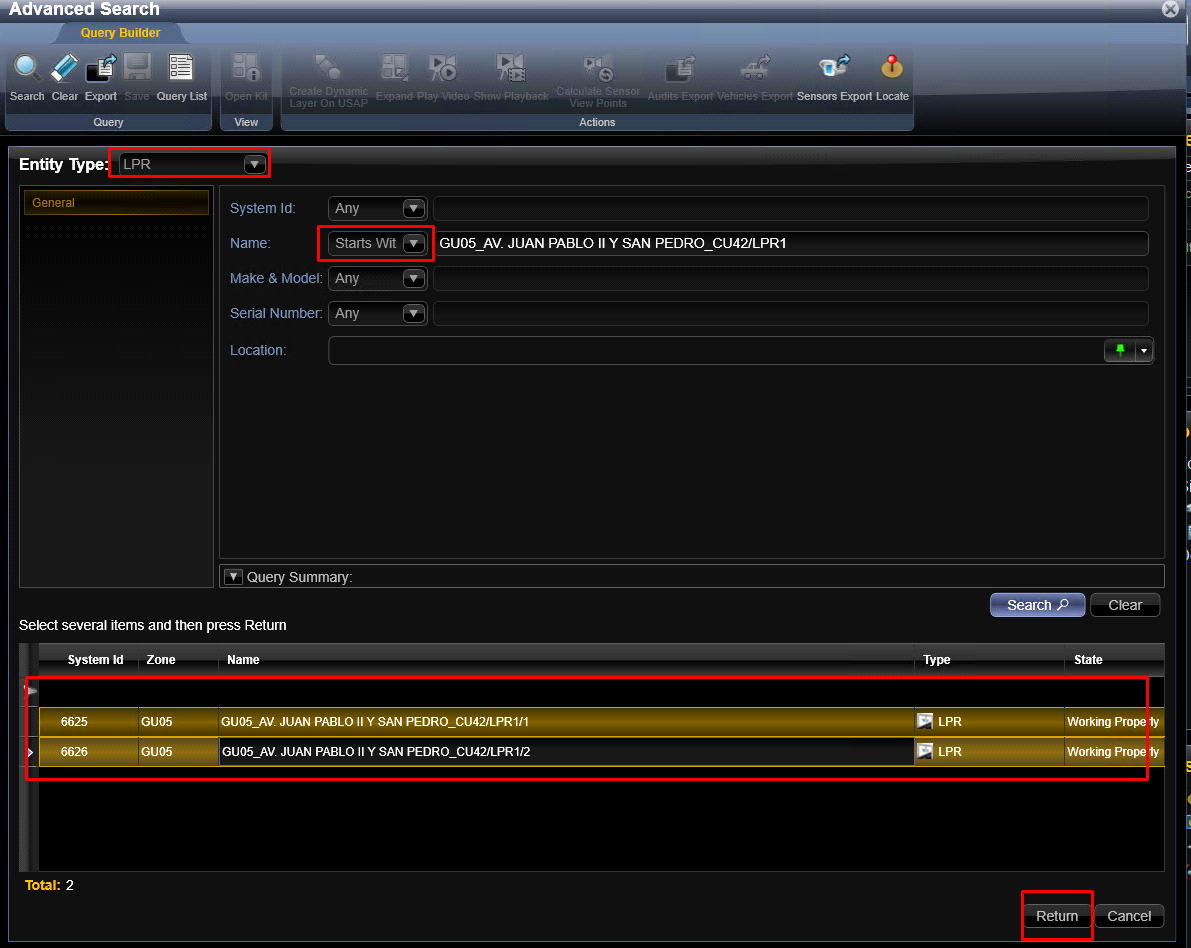
- Device list – click on “Add” button and search for the LPR’s sensors which associated with this Gantry and add them to the list.
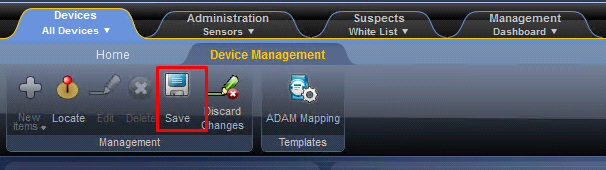
- Click on “Save” button to save the new Gantry information
In the following example we will add new Signal Gantry Segment for the Gantry that was added in section 2
LPR names are:
GU05_AV. JUAN PABLO II Y SAN PEDRO_CU42/LPR1/1
GU05_AV. JUAN PABLO II Y SAN PEDRO_CU42/LPR1/2
Gantry Name:
GU05_AV. JUAN PABLO II Y SAN PEDRO_CU42_1
Segment Name:
A Single segment name is based on Gantry name + Azimuth, so in this this example, the new segment name is:
GU05_AV. JUAN PABLO II Y SAN PEDRO_CU42_1_N
- Open CityMind client as rootadministrator user
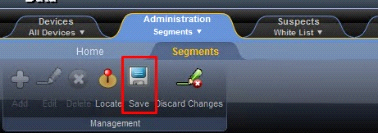
- On “Data” windows go to Administrator TAB 🡪 “Segments”
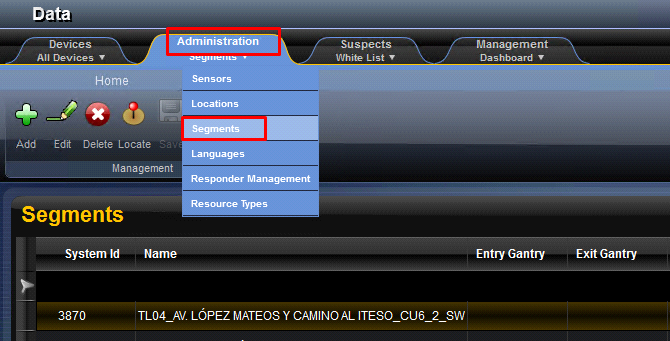
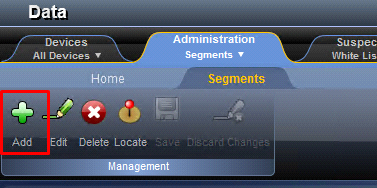
- Add new segment
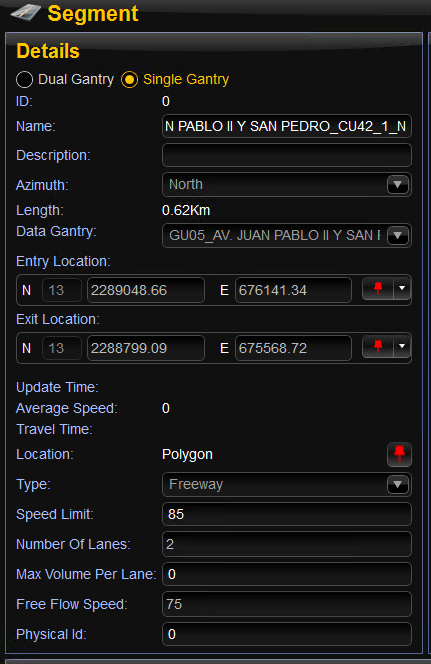
- Complete Segment information
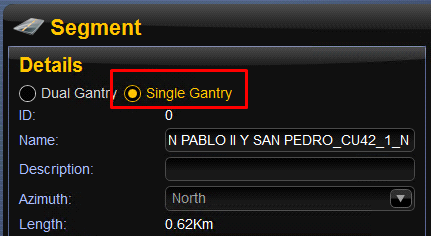
- Select “Single Gantry” option
- Name: GU05_AV. JUAN PABLO II Y SAN PEDRO_CU42_1_N
- Azimuth: North
- Data Gantry: Select the correct Gantry from the drop-down list
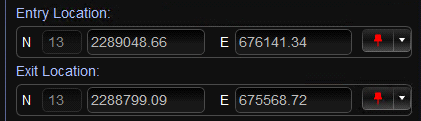
- Entry /Exit Location: Click on the “coordinate” icon and go to the Map screen and click on the entry point when cars are entering to LPR zone
Make sure to put the Entry and Exit location in normal distance so the Segment line will be shown on Map
![]()
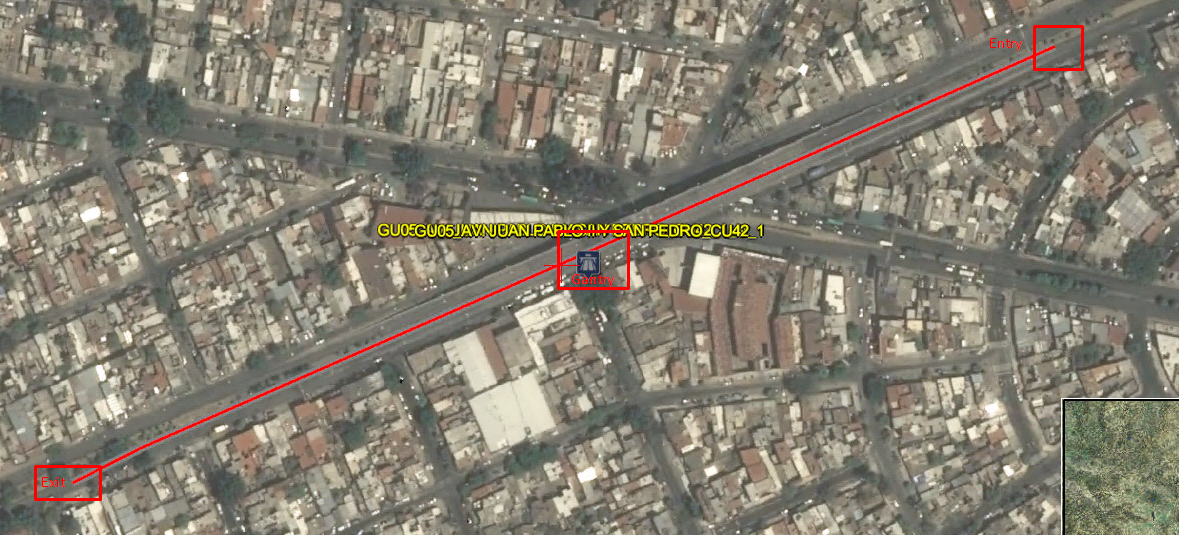
If you put the Entry / Exit location ok, than system will drow the segmnet on the MAP.
If you domnt see the segmnet than select different location:
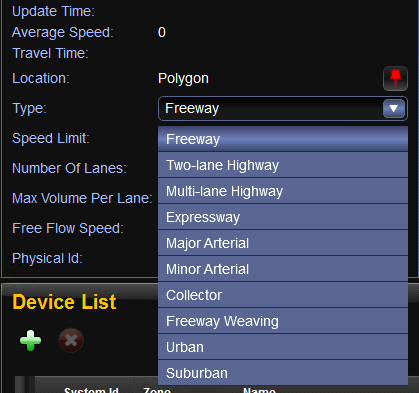
- Type: Select the correct type of the road:
- Road Speed Limit: for example, 85 KM/H
- Number of Lanes: according to the number of LPR’s located in that Gantry
- Save
Example: if LPR Heading is 15 than Azimuth is “North”
This means that LPR camera is pointed to “North” Direction however cars and driving South.
In this case we should always put the Azimuth of the LPR direction and not the car
Created with the Personal Edition of HelpNDoc: Full-featured multi-format Help generator