LPR Camera Configuration
The purpose of this document is to guide customer how to install and configure the LPR camera in GDL site to support Neurosoft LPR system for best performance LPR detections.
This document applies only for following system / component:
- LPR System: Neurosoft
- Camera type: Bosch DINION IP starlight 6000 HD

![]()
Login to camera via web browser (using camera IP) and configure camera according to following best practice recommendation
- Go to Camera 🡪 Installer Menu
- Base Frame rate: 25 fps
- Camera LED: Enable
- Mirror image: Off
- Button ‘MENU’: Enable

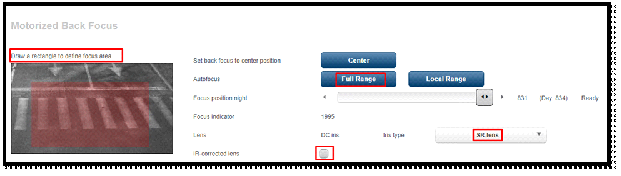
- Press “Lens Wizard…” button
- Define focus area
- Click on full Range and verify optimal focus is set - make sure to set the focus so that the plates are clearly readable
- Uncheck IR-correction Lens
- Perform this action in Day and Night.
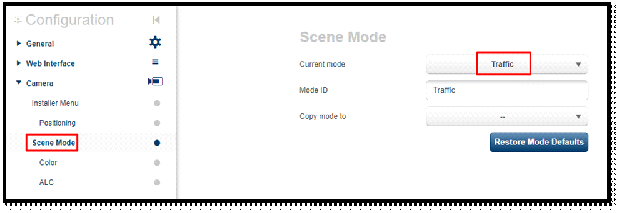
- Go to Camera 🡪 Scene mode
- Set current Mode: Traffic
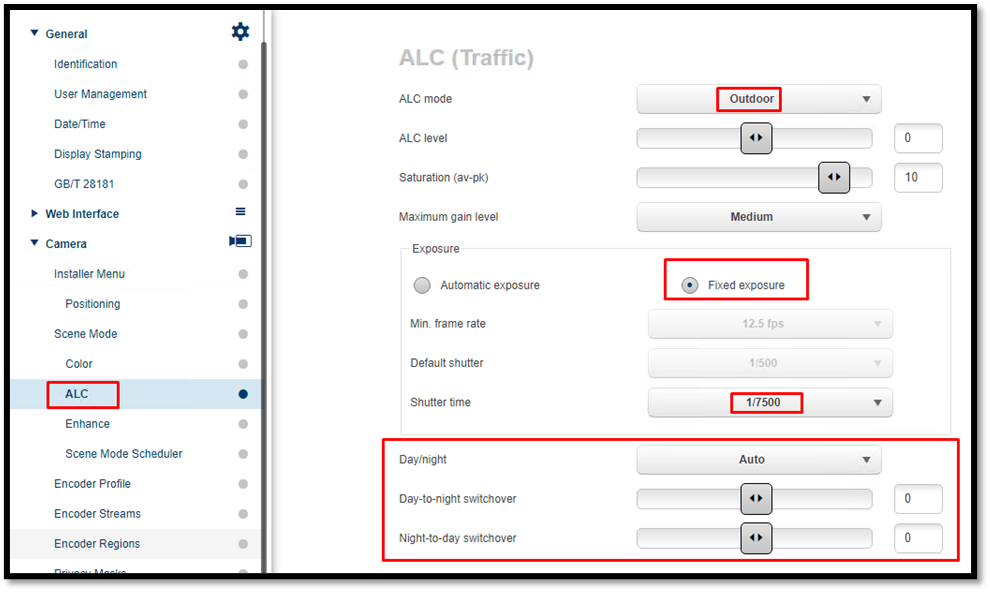
- Go to Camera 🡪 ALC
- ALC Mode: Outdoor
- Exposure: Fixed
- Shutter time: 1/7500
- Day/Night: Auto
- Day-to-night switchover: 0
- Night-to-day switchover: 0
- Go to Camera 🡪 Encoder Profile 🡪 Profile 1
- Profile Name: LPR
- Target bit rate : 1200
- Maximum bit rate: 2400
- Encoding interval: 12.5 fps
- Go to “Expert Settings”
- Set “GOP Structure”: IP
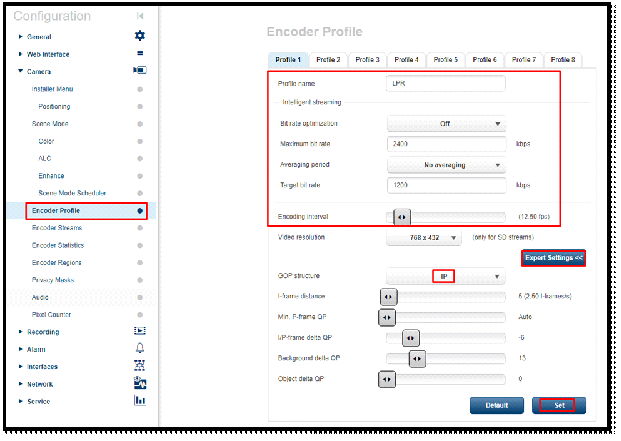
- Press Set button
- Go to Camera 🡪 Encoder Stream 🡪 Profile 1 TAB
- Set “Stream 1” with “LPR” profile you set in previous step

Created with the Personal Edition of HelpNDoc: Easily create CHM Help documents